Dissertation Tutorial
Hello! Welcome to the tutorial for creating your own Temple dissertation. If you are a graduate student looking for an easy way to create your own dissertation, you have come to the right place! Simply follow these steps and you will have your own streamlined dissertation in no time. This dissertation template was adapted from Tyson Stanley’s “Dissertate for USU” template for Temple University.
Uploading the file
Step 1: Download Rstudio or log into your Rstudio.cloud account. Here, you should open a new project and title it so that you can remember where it is.
Step 2: Download the .zip file above.
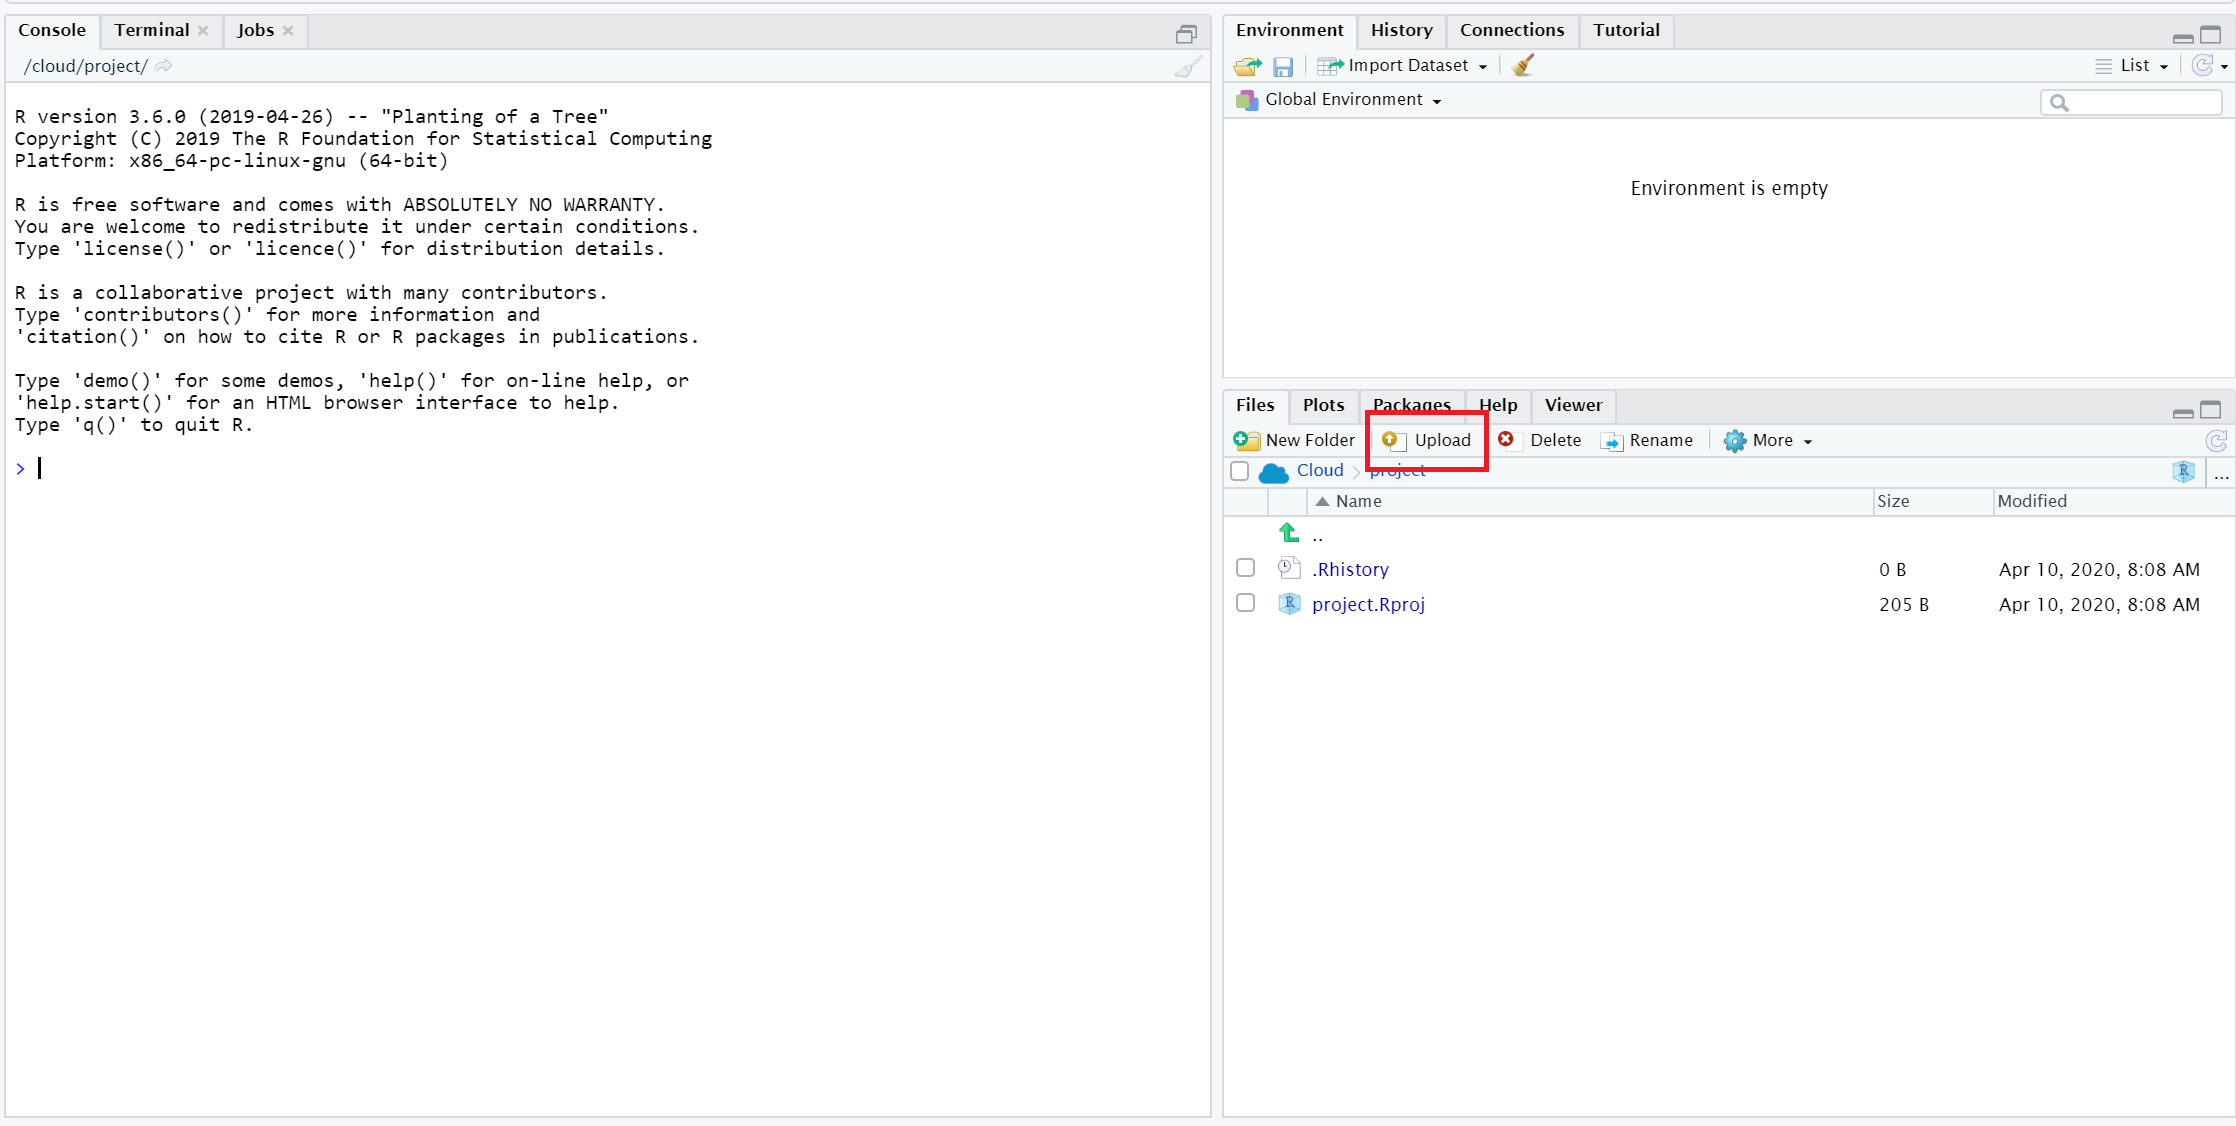
Step 3: Open a new project. On RStudio, use the upload button (shown below) to upload the .zip file.
Step 4: Once you have uploaded the .zip file, open the dissertation folder. Then, click on the dissertation.Rproj file and click “yes” to open the project.
Install necessary packages
Step 1: Open the README.R file.
Step 2: Follow the instructions on the file to run the code installing packages.
Start writing your dissertation
Step 1: Open the templediss file, and then the templediss.Rmd file.
Step 2: To ensure that your packages are all in line, press the “knit” button at the top of the script.
If you get a pop-up saying you need more packages, say “yes” to install the necessary packages.
If you get the following error, following the website link and attempt to debug the script. We have had better luck getting this to work on the desktop version of RStudio, not RStudio.cloud.
Error: LaTeX failed to compile templediss.tex. See https://yihui.org/tinytex/r/#debugging for debugging tips
Editing title page & preferences
Step 1: Edit the YAML (beginning of the document) with your title, author name, year, degree, field, department, and committee members.
Tip: It is helpful to try to knit your document every few times you change the document, just so that you don’t finish the whole dissertation and then find out something is wrong.
Abstract
Step 1: Scroll down to the abstract section of the templediss.Rmd file. Replace the written words with your abstract. Do the same for the Public Abstract, Dedication, and Acknowledgements sections. Do not change any of the formatting.
Chapters
Step 1: Scroll to the chapter that you are working on in the templediss.Rmd file and change the title in the following code:
\chapter{Chapter 2's Title}
Step 2: Go to the corresponding file for each chapter. For example, open the Chapter2.Rmd file to work on the content for chapter 2.
Step 3: Write your chapter. You can erase the text in the file, and the “\lipsum”, but make sure to keep the “\doublespacing” command. When you want to add a citation, follow the steps in the “Bibliography” section of this tutorial.
Bibliography
Step 1: Open the yourbibfile.bib file.
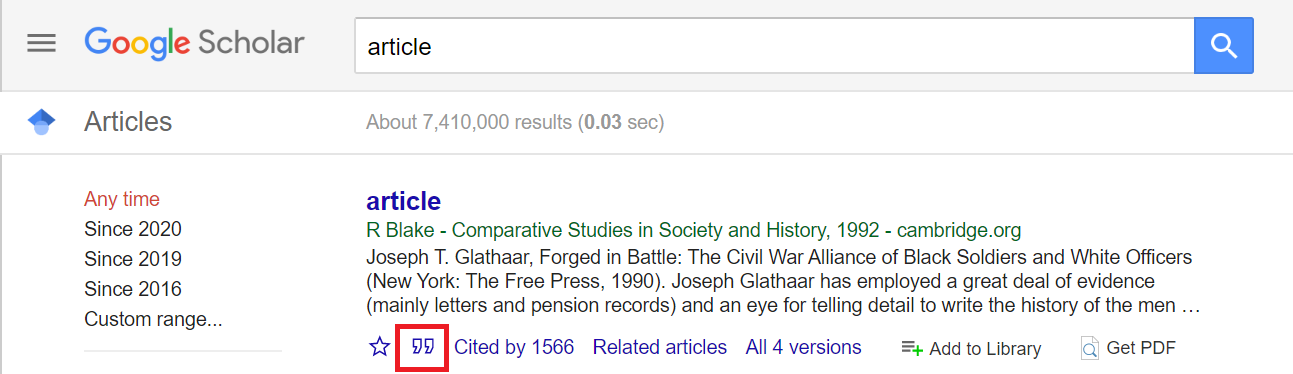
Step 2: In your browser, go to Google Scholar. Type in the name of the article you want to cite.
Step 3: Click the small quotation marks underneath your citation.
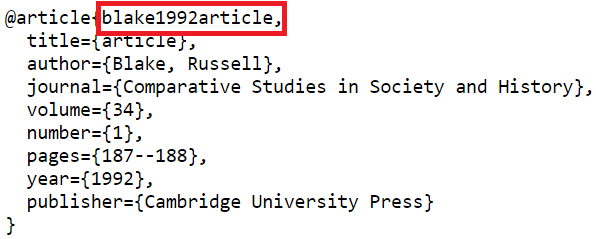
Step 4: Click on “BibTex” at the bottom of the pop-up.

Step 5: Copy the text that pops up and paste it into the yourbibfile.bib file. Make sure the formatting looks the same it did in your browser.
Step 6: To cite in your paper, simply insert the tag name of your citation into your text. Wherever you want a citation, use [@TAGNAME]. For example, for the following citation:
You would use the text
[@blake1992article]
When you knit the file, the citations will be in the correct APA formatting and there will be a bibliography at the end of the document.
You’re all done!
That’s the end of this basic tutorial. For more tutorials about how to use dissertate, check out Tyson Stanley’s Github Tutorial and his additional tutorial.
Peyton Coleman
Student
My research interests include music cognition, genetics, and auditory neuroscience.